The Essential Quilting Tools is a list of the tools that you will need as you begin your journey to learn to quilt. If you’re a beginner or would like to learn to quilt, you’re in the right place!
In this Quilting for Beginners / Learn to Quilt series, we’re gonna take things step-by-step. Nice and slow. And I’m gonna walk you through every step of the way! In fact this is lesson number two in the series.

In the first lesson we identified the different methods used in piecing a quilt. You can read more about the methods HERE. As I mentioned, for the purpose of this quilting series, we are going to focus on straight machine stitching.
If you are going to sew a quilt, there are a few essential tools that you’ll want to have on hand.
Essential Quilting Tools
If you have ever visited a local quilt shop or fabric store, you may have been a little overwhelmed by ALL THE TOOLS on display. Or maybe you’ve been watching a few YouTube videos and you’re left wondering what on earth they’re using?
There are A LOT of tools. I couldn’t even begin to tell you how many different tools there are. And as you continue on your quilting journey, you can add to your quilting arsenal as you see fit. In the meantime, let’s start with the essentials.
- fabric scissors (I like these and these.)
- small scissors (I use these and these.)
- sewing pins (My favorites are these and these.)
- Wonder clips
- acrylic ruler (This is my favorite size.)
- rotary cutter (28mm and 45mm or this 45mm)
- self healing cutting mat (24×36 is my recommended size)
- seam ripper (The sharpest seam ripper I’ve EVER used!)
- fabric marking pen (These pens are what I use.)
- iron (Fav full size; fav mini iron.)
- ironing surface (Ironing board or pressing mat or wool mat.)
- spray starch (Absolute favorite – buy 2!)
- sewing machine (Read here about what to look for in a sewing machine, or recommended beginner friendly machines or affordable beginner friendly machines.)
Now let’s take a closer look at each of these quilting essential tools.
Essential Quilting Tools
A list of the essential quilting tools that you will need to have on hand as you learn to quilt.

You need a designated "fabric" cutting scissors. Why? Because cutting paper, zippers, or other craft supplies with your scissors will dull them. When you're cutting fabric, you want sharp scissors. That's exactly what you'll get with the Missouri Star Scissors!
Plus, they have a rubber grip in the finger and thumb holes that helps to keep the scissors from slipping during use.

These small scissors from Missouri Star Quilt Co. are the perfect scissors to keep near your sewing machine. They come in super handy for trimming threads.

You will want some pins to hold your quilt pieces together while you stitch them. I like to use the long pins. These flat head pins are really nice because the heads on them are flat. A couple other of my favorites are these long pins or these glass head pins,

These clips are a great way to hold layers of fabric together, especially bulky layers. I'd be lost without my clips! You can use pins, but the clips are one of those tools I consider a game changer!

I can't imagine trying to cut fabric for piecing a quilt without a rotary cuttery, acrylic ruler, and a self-healing cutting mat. This 6"x24" ruler is a good starting point. The 24" long ruler will allow you to cut across the width of the fabric.
You'll also find it handy to have a smaller ruler on hand, such as this 6"x12" Olfa Frosted Ruler or this 4-1/2"x12-1/2" Creative Grids Ruler. The nice thing about the Olfa and Creative Grids brands is that they have a non-slip surface. I have several Fiskars and Omnigrid rulers as well.
As you get into quilting more, there will probably be several sized rulers you'll want to have on hand.

This is the rotary cutter that I reach for most often when cutting fabric. Just like the MSQC scissors, the rotary cutter has a really nice feel in the hand and the blades are super sharp. Perfect for cutting fabric for quilting!

Although you can get by with just the 45mm rotary cutter, I find that having a smaller rotary cutter handy at my sewing machine is super helpful. I love the feel of the Missouri Star Quilt Co rotary cutters and I think you will too!
The 28mm rotary cutter is great for trimming seam allowances. trimming "dog ears" and other small cutting tasks.

A self healing cutting mat is essential for use with a rotary cutter. In fact, you should not use a rotary cutter without a mat. My favorite size is 24"x36". I have only ever used Fiskars brand mats, so I can't attest to the other brands.
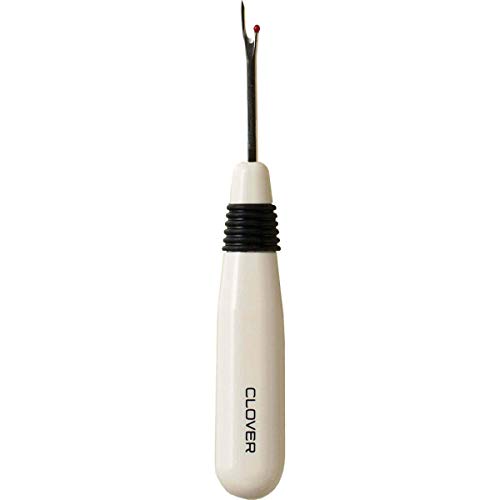
You will need a seam ripper to rip out seams. It doesn't matter if you're a beginner or have years of experience, a seam ripper is your friend. My absolute favorite seam ripper is this one from Clover. But any seam ripper will do!
Be sure to ask me about my second favorite seam ripper!

There are a variety of fabric marking pens you can purchase. My personal favorite are these Frixion Pens by Pilot. Some that I have used are:

It really doesn't matter what brand of iron you use. You just need an iron that gets hot and works for you. I currently have two Oliso irons, their full size and the mini (M3Pro). The M3Pro is the perfect little iron to keep beside my sewing machine.
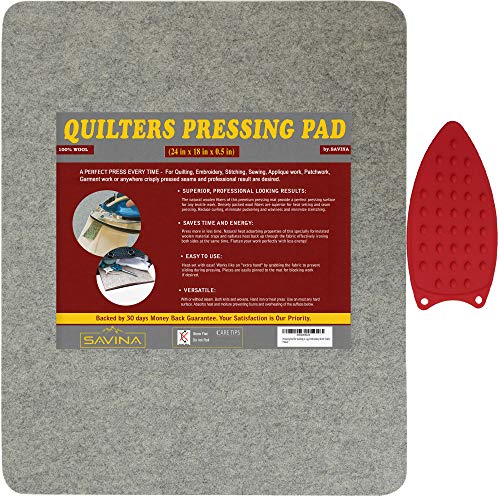
Whether you use an ironing board, pad, or a wool pressing mat, you will need a surface to iron on. You will likely starch and iron your fabric before you cut it. And you'll also use your iron to press your seams as you piece your quilt blocks. You'll use your iron a lot!
I like to use a wool pressing mat and I keep it on top of my ironing board. It's also very portable, so I can move the wool mat by my sewing machine if I want or even take it with me. Of course having a larger surface is also nice for when you initially starch and iron your fabric.

The one thing that has made the biggest difference in my quilting is spray starch. When you are piecing a quilt, it is important to have accurate seams. Spray starch helps to not only press the fabric, but it adds stiffness and helps to keep the fabric from stretching.
You will use a lot of spray starch. The Faultless Premium Luxe Spray Starch is my favorite. Some other brands I've used with success are:

Obviously, if you are going to sew a quilt, you will need a sewing machine. As far as piecing a quilt goes, it doesn't really matter what kind of machine you have. You just need a sewing machine that can sew a straight stitch.
If you plan on quilting (stitching the quilt top, batting, and backing) on your machine, you'll want to use a machine that has a wide throat and can handle the thickness. You'll also want to look for a machine that has a walking foot.
You can read all about what to look for in a sewing machine HERE. And read about recommended beginner friendly sewing machines HERE.
Download the Essential Quilting Tools Checklist
For a printer-friendly version of the Essential Quilting Tools Checklist, just complete the below form and I’ll send it directly to your email inbox!
Be sure to add pam@hookedonsewing.com to your contacts or safe-sender’s list to avoid email delivery issues.
More Quilting Help
This was lesson number two in the Quilting for Beginners Learn to Quilt series. In the first lesson we learned all about the different quilting methods. Stay tuned for more quilting tutorials as we continue our journey.


Leave a Reply