Learn how to sew a basic pillowcase in this learn to sew series. When you learn how to sew a pillowcase, you’ll want to make one for everyone!
Okay, so hopefully by now you have a sewing machine, your basic sewing supplies, and have learned how to thread your machine, wind a bobbin and maybe even sewn a few stitches.

It’s time to finally sew something. Sew, how about learning how to sew a basic pillowcase? Don’t worry, we’ll have more challenging sewing projects to tackle in the very near future.
But, for now, I wanted to get you started with sewing something that’s perfect for beginner sewists (like you). Because this is such an easy and fun project, it will be a positive experience that will fuel you to want to sew more.
How to Sew a Basic Pillowcase
Skills Required
This tutorial is for the simplest and easiest pillowcase you can make. All you need to know to sew a basic pillowcase is:
- How to thread your sewing machine.
- How to load a bobbin (or maybe how to wind a bobbin) in your sewing machine.
- How to sew a straight stitch.

Equipment Needed
Obviously, you’ll need a sewing machine if you’re going to make a pillowcase. If you haven’t yet purchased a sewing machine, you can read about what to look for in a sewing machine and my beginner friendly sewing machine recommendations.
- sewing machine
- zigzag foot
- bobbin
- scissors
- rotary cutter
- cutting mat
- acrylic ruler
- iron and ironing board
Supplies Needed
You’ll obviously need fabric to sew a basic pillowcase. But, what type of fabric? I recommend that you use cotton, quilter’s cotton or a cotton blend. Here are the supplies needed:
- cotton fabric
- matching thread

Video Tutorial
The easiest way to follow along and learn how to sew a basic pillowcase is to watch my video tutorial. Simply click on the image below to go to my YouTube video. While you’re there, be sure to subscribe to my channel so you can follow along with new sewing tutorials!


Sew a Basic Pillowcase
Make a basic pillowcase using one yard of fabric and matching thread. Once you learn how easy it is to make these pillowcases, you'll want to make them for everyone you know!
Materials
- 1 yard cotton fabric
- matching all-purpose thread
Tools
- sewing machine
- zigzag foot
- bobbin
- rotary cutter
- cutting mat
- acrylic ruler
- scissors
- iron
- ironing board
Instructions
Prepare Fabric
- Before you begin this project, be sure to wash, dry, and iron your fabric. This will help with pre-shrinking the fabric and help give you the best results.
Fabric Cuts
- Cut 1 piece of fabric 42" wide by 36" long.
Sewing Instructions
- Fold over 1/2" along the top edge towards the wrong side of the fabric and press with your iron.
- Fold over 4" and press with your iron.
- Unfold the 4" fold of fabric, right sides together, line up raw edges and stitch, using a 1/2" seam, down the side and across the bottom.
- Turn pillowcase right side out, fold down top of fabric along 4" fold, then pin in place. Stitch 1/8" from edge to hem the top of the pillowcase.
- You're all finished!
This is the very basic way to sew a pillowcase. There are other options, such as finishing the seams with a zigzag stitch, French seams, and even the burrito method. We'll cover each of those in separate tutorials.
Recommended Products
As an Amazon Associate and member of other affiliate programs, I earn from qualifying purchases.
-
 Dritz Extra-Fine Glass Head Pins, 1-3/8-Inch (250-Count)
 -
 Clover Wonder Clips
 -
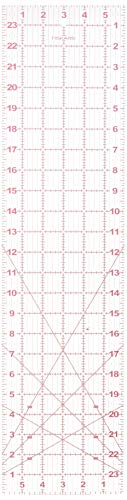 Fiskars Acrylic Ruler, 6x24 Inch
 -
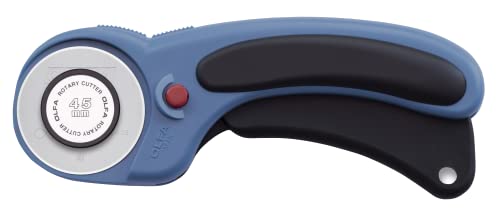 OLFA 45mm Ergonomic Rotary Cutter
 -
 Missouri Star Rotary Cutter, 45mm Blade
 -
 Janome Memory Craft Horizon 8200 QCP Sewing Machine
 -
 Fiskars Self Healing Cutting Mat, 24x36”
 -
 SINGER Quantum Stylist 9960 Sewing Machine
What’s Next?
This is the easiest pillowcase sewing tutorial. Are you ready to learn something a little more challenging? How about a pillowcase with a contrast band and some pretty trim?
Be sure to sign up for the Hooked on Sewing newsletter so you’ll be the first to know when there are new sewing tutorials or patterns available:
Need more help?
You’ve come to the right place if you need more sewing help. You’ll find all sorts of helpful posts, like:
In the meantime, be sure to save this tutorial to your favorite Pinterest board so you can refer to it later or share it with family and friends.



Thank you., I enjoy your lessons and have learned so much.
Jackie, that is so great to hear! Feel free to ask questions or post a comment anytime!
Pam Baker
Hooked on Sewing
Pam, I’m so thankful to have found you! I’m slowly building my sewing skills (and confidence) and your tutorials and instructions have really helped! I’ve learned a lot from your lessons and appreciate your thorough explanations. They make sense and are easy to follow. Please keep posting projects! I’ll definitely give them a try! : )
That is so great to hear! Thank you!
Pam Baker
Hooked on Sewing