Learn how to Sew an Oven Mitt with Finger and Thumb Pockets to make a set of mini pot holders or mini oven mitts.

Cookie baking season, as well as the holiday gift giving season, are here! These oven mitts are perfect for using with cookie sheets, grasping lids, and more!
Without the bulk of traditional potholders or oven mitts, they are the perfect size for baking.

How to Use an Oven Mitt with Finger and Thumb Pockets
These oven mitts were designed to protect your hands while handling hot pans and sheets from the oven. To use, simply slide your fingers into the larger pocket end of the oven mitt and slide your thumb into the smaller pocket in the slot for your thumb.
Then when you grasp a cookie sheet, oven tray, roasting pan, or even a lid, you simply clasp your fingers and thumb together. The oven mitt stays in place to protect your hands. And without the bulk of traditional potholders or oven gloves and mitts.


They have what is considered a clam shell design. I made the oven mitts just small enough to reduce bulk, but large enough to accommodate small to large hands.

How to Resize the Oven Mitts
If you want your oven mitt smaller, trim your potholder down to maybe 7-1/2″ (instead of 8″).
Likewise, if you want your oven mitt larger, start with cutting your fabric pieces maybe 1″ to 1-1/2″ larger. So, instead of cutting your fabric 8-1/2″ high, cut it 9-1/2 to 10″ high by 7″ wide. Just remember to increase the cutting sizes for the pockets and batting pieces accordingly.
Sew an Oven Mitt with Finger and Thumb Pockets
Tools and Equipment Needed
You will need basic sewing tools to sew an oven mitt. You probably have everthing you need on hand.
- scissors
- rotary cutter
- self healing cutting mat
- acrylic ruler
- pins
- Wonder clips
- fabric marker
- sewing machine
- quilting needle for sewing machine
- walking foot
Supplies Needed
- cotton fabric
- (2) 8-1/2″Hx6-1/2″W cotton fabric for oven mitt front and back
- (1) 2″W x 28″L cotton fabric for binding
- (1) 6-1/2″Wx7″H cotton fabric for fingers pocket
- (1) 6-1/2″Wx6″H cotton fabric for thumb pocket
- cotton batting
- (1) 8-1/2″x6-1/2″ for oven mitt
- (1) 6-1/2″x3-1/2″ for fingers pocket
- (1) 6-1/2″x3″ for thumb pocket
- Insul-bright insulated lining
- (1) 8-1/2″x6-1/2″ for oven mitt
- cotton thread (Guterman) or cotton thread (Aurifil)
Sewing Machine Walking Foot
Just a quick word on the walking foot. Because you will be quilting through thick layers of cotton fabric and batting, a walking foot is super handy. It will allow you to stitch over the bulk more smoothly. You can use a regular sewing machine foot. Just be sure to take it slow and pin your layers together well.
Instructions
Step One: Cut Fabrics
Make your fabric cuts according to the below fabric cuts in the how-to section.
Step Two: Press
Press the two pocket pieces in half wrong sides together. Then press the binding strip in half also wrong sides together


Step Three: Quilt
Lay the oven mitt back piece face down (or wrong side up), then lay the insulated batting on top, followed by the cotton batting piece, and finally lay the the oven mitt front piece right side up (this is called a quilt sandwich). Pin or clip along the edges to secure the pieces together.
Next you’ll quilt the pieces together. You can mark the fabric using a fabric marking pen and ruler, use a sewing guide, or use your needle plate to help sew straight lines. Use a long stitch length of 3.0-4.0mm. I like to start in the middle of the oven mitt pieces. Stitch one line and then repeat every 1/2″ to the edge of the mitt. Repeat with the stitching on the other side of the center stitch line.


You will also quilt the two pocket pieces. Take 6-1/2″x7″ finger pocket piece and lay it wrong side up. Lay the 6-1/2″x3-1/2″ piece of cotton batting so the long edge is even with one of the long edges of the cotton fabric. Fold the fabric over top of the batting and pin or clip in place. Repeat with the 6-1/2″x6″ thumb pocket piece. Again, using a long stitch length, quilt the two pocket pieces. I like to use horizontal stitches spaced 1/2′ apart. But you can quilt the two pieces any way you like!

Step Four: Assemble
Lay the quilted oven mitt piece front side up. Lay the quilted thumb pocket piece right side up at the top of the oven mitt with the raw edges even and the fold towards the middle of the mitt. Pin in place. Lay the quilted finger pocket piece right side up at the bottom of the oven mitt with the raw edges even and the folds towards the middle of the mitt. Pin in place. Baste the pocket pieces to the oven mitt using an 1/8″ seam allowance around the perimeter of the mitt.
Round the oven mitt corners. I simply place a small circle at each corner of the oven mitt back, trace around the circle at the corner and then cut along the drawn arch round the corner. Repeat with each corner.
On the thumb pocket, make a mark 1-1/2″ from each side edge. This will form the pocket for your thumb. Stitch along the marked line, backstitching at the beginning and end to secure the stitches.


Step Five: Attach Binding
Line up the raw edges of the binding with the raw edge of the oven mitt back. Clip or pin place. Be sure the tail end of the binding overlaps the beginning about 1″ or so. Then stitch using a 1/4″ seam allowance.
Trim the edges of the potholder.
Then fold the binding towards the front and pin in place. Stitch close to the edge using about 1/8″ seam allowance. Be sure to backstitch at the beginning and end to secure your stitches.


Get the Pattern
You can download the pattern by clicking on the below button. You’ll then need to fill in your first name and email address in the form to have the pattern delivered straight to your email inbox!
Video Tutorial

Sew an Oven Mitt with Finger and Thumb Pockets
Make this handy oven mitt with finger and thumb pockets. They make grabbing a cookie sheet or baking pan super easy and without the bulk of a regular pot holder.
Materials
- cotton fabric
- cotton batting
- insulated batting
- thread
Tools
- scissors
- rotary cutter
- acrylic ruler
- self-healing cutting mat
- clips or pins
Instructions
These instructions are for ONE (1) oven mitt. To make a pair or a set of two oven mitts, repeat the fabric cuts.
Fabric Cuts
Fabric A - Oven Mitt Front and Back
(2) 8-1/2"Hx6-1/2"W cotton fabric for oven mitt front and back
(1) 2"W x 28"L cotton fabric for binding
Fabric B - Pockets
(1) 6-1/2"Wx7"H cotton fabric for fingers pocket
(1) 6-1/2"Wx6"H cotton fabric for thumb pocket
Cotton Batting
(1) 8-1/2"x6-1/2"
(1) 6-1/2"x3-1/2"
(1) 6-1/2"x3"
Insulated Batting
(1) 8-1/2"x6-1/2"
INSTRUCTIONS
- Press the two pocket pieces in half with the wrong sides together. Pocket pieces should measure 6-1/2"Wx 3-1/2"H and 6-1/2"Wx3"H.
- Press the binding strip in half with wrong sides together. Once pressed, your binding strip should measure 1"x28"L.
- Lay the oven mitt back piece face down (or wrong side up), then lay the insulated batting on top, followed by the cotton batting piece, and finally lay the the oven mitt front piece right side up (this is called a quilt sandwich). Pin or clip along the edges to secure the pieces together.
- Next you'll quilt the pieces together. You can mark the fabric using a fabric marking pen and ruler, use a sewing guide, or use your needle plate to help sew straight lines. Use a long stitch length of 3.0-4.0mm. I like to start in the middle of the oven mitt pieces. Stitch one line and then repeat every 1/2" to the edge of the mitt. Repeat with the stitching on the other side of the center stitch line.
- You will also quilt the two pocket pieces. Take 6-1/2"x7" finger pocket piece and lay it wrong side up. Lay the 6-1/2"x3-1/2" piece of cotton batting so the long edge is even with one of the long edges of the cotton fabric. Fold the fabric over top of the batting and pin or clip in place. Repeat with the 6-1/2"x6" thumb pocket piece. Again, using a long stitch length, quilt the two pocket pieces. I like to use horizontal stitches spaced 1/2' apart. But you can quilt the two pieces any way you like!
- Lay the quilted oven mitt piece front side up. Lay the quilted thumb pocket piece right side up at the top of the oven mitt with the raw edges even and the fold towards the middle of the mitt. Pin in place. Lay the quilted finger pocket piece right side up at the bottom of the oven mitt with the raw edges even and the folds towards the middle of the mitt. Pin in place. Baste the pocket pieces to the oven mitt using an 1/8" seam allowance around the perimeter of the mitt.
- Round the oven mitt corners. I simply place a small circle at each corner of the oven mitt back, trace around the circle at the corner and then cut along the drawn arch round the corner. Repeat with each corner.
- On the thumb pocket, make a mark 1-1/2" from each side edge. This will form the pocket for your thumb. Stitch along the marked line, backstitching at the beginning and end to secure the stitches.
- Line up the raw edges of the binding with the raw edge of the oven mitt back. Clip or pin place. Be sure the tail end of the binding overlaps the beginning about 1" or so. Then stitch using a 1/4" seam allowance.
- Trim the edges of the potholder.
- Then fold the binding towards the front and pin in place. Stitch close to the edge using about 1/8" seam allowance. Be sure to backstitch at the beginning and end to secure your stitches.
Notes
I used two different fabrics for my oven mitts. I used Fabric A for the front and back of the oven mitts, as well as the binding. I used Fabric B for the two pockets.
You can use all the same fabric or mix things up. You can also use store bought binding or bias tape if you don't want to make yours.
Recommended Products
As an Amazon Associate and member of other affiliate programs, I earn from qualifying purchases.
-
 Fiskars Softgrip Scissors Straight Stainless Steel, 8 Inch,Gray
 -
 Dritz Extra-Fine Glass Head Pins, 1-3/8-Inch (250-Count)
 -
 Clover Wonder Clips
 -
 SCHMETZ Universal Sewing Machine Needles - Size 90/14
 -
 Gutermann Thread Set
 -
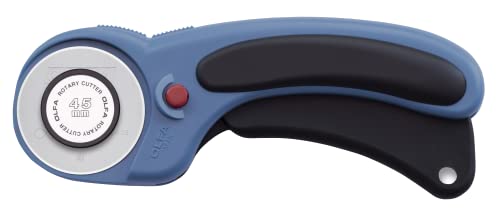 OLFA 45mm Ergonomic Rotary Cutter
 -
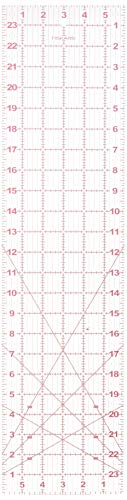 Fiskars Acrylic Ruler, 6x24 Inch
 -
 Fiskars Self Healing Cutting Mat, 24x36”
 -
 Janome MOD-50 Computerized Sewing Machine
 -
 Janome Memory Craft Horizon 8200 QCP Sewing Machine
More Sewing Fun
This Oven Mitt with Finger and Thumb Pockets is easier to sew than you might think. I hope you give it a try! If you have any questions, just leave them in the comments!
If you enjoyed this project, you Might also like these sewing patterns from Hooked on Sewing:


There are no instructions on how to place the stitching for the thumb opening on the thumb pocket in either the written instructions or video.
Thanks, Cathy, for bringing this to my attention. When I first developed the pattern I did not include the stitching for the thumb pocket. And I guess I simply forgot to update the pattern to include this step.
I am away from my sewing studio today, but will verify the pattern and update instructions when I return on Monday.
I believe I measured in 1-1/2” from each side and stitched the thumb pocket, backstitching at the beginning and end to secure the stitches.
But I’ll verify this on Monday, update the instructions and get back with you!
Thank you so much for taking the time to bring this to my attention.
Pam Baker
Hooked on Sewing
Thanks, Cathy. I have updated the instructions to including marking and stitching 1-1/2″ from the edges of the thumb pocket. This will make the pocket for the thumb,
Again, thanks for bringing this to my attention!
Pam Baker
Hooked on Sewing