Learn how to sew a Glass Flute Mason Jar Cozy with this free Ball Regular Mouth Flute Mason Jar Glass Cozy pattern from Hooked on Sewing.

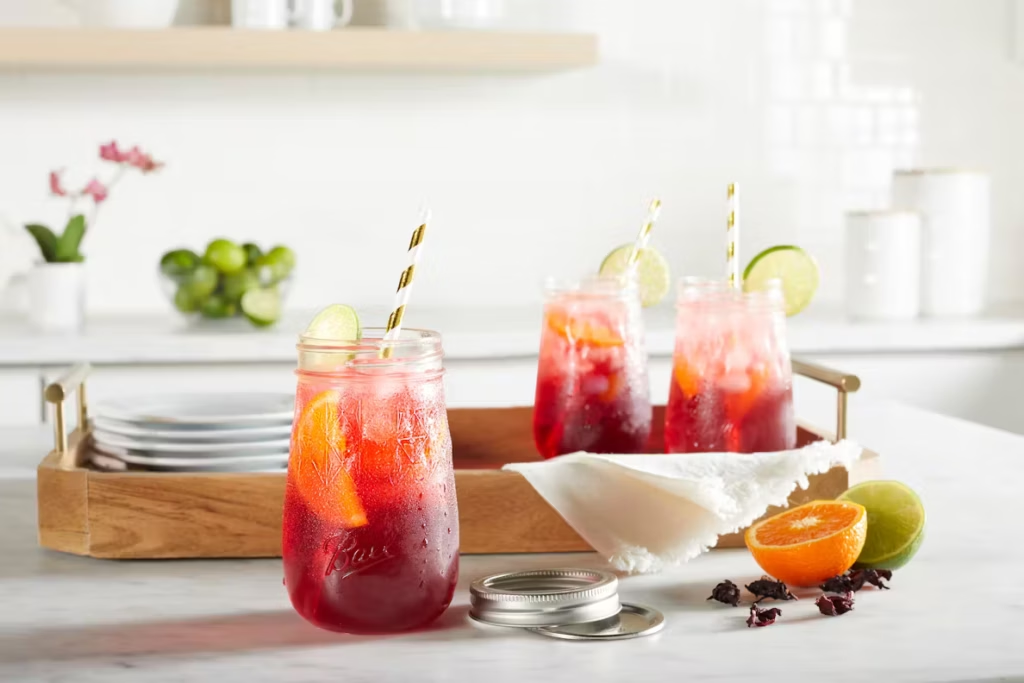
People have used Mason jars for drinkware for years. Years and years, actually. In fact there are any number of restaurants you can visit that serve their beverages in good ol’ fashioned Ball Mason Jars!
About the Ball Glass Flute Mason Jars
Ball has these Flute Jars that are just so cute (You can find them at Walmart or Target – and other stores here in the USA. In Canada, you can find them at Mason Jars Merchant.). I’ve also seen them advertised at Ace Hardware, Blain’s Farm and Fleet.
And I was in search of drinkware for my granddaughters (10 years old) who were coming for a visit. I couldn’t find exactly what I wanted, so I decided to use the Flute Jars and make some custom cozies to go with them.
Then I found these Mason jar lids in such really fun colors and my drinkware selection was complete!
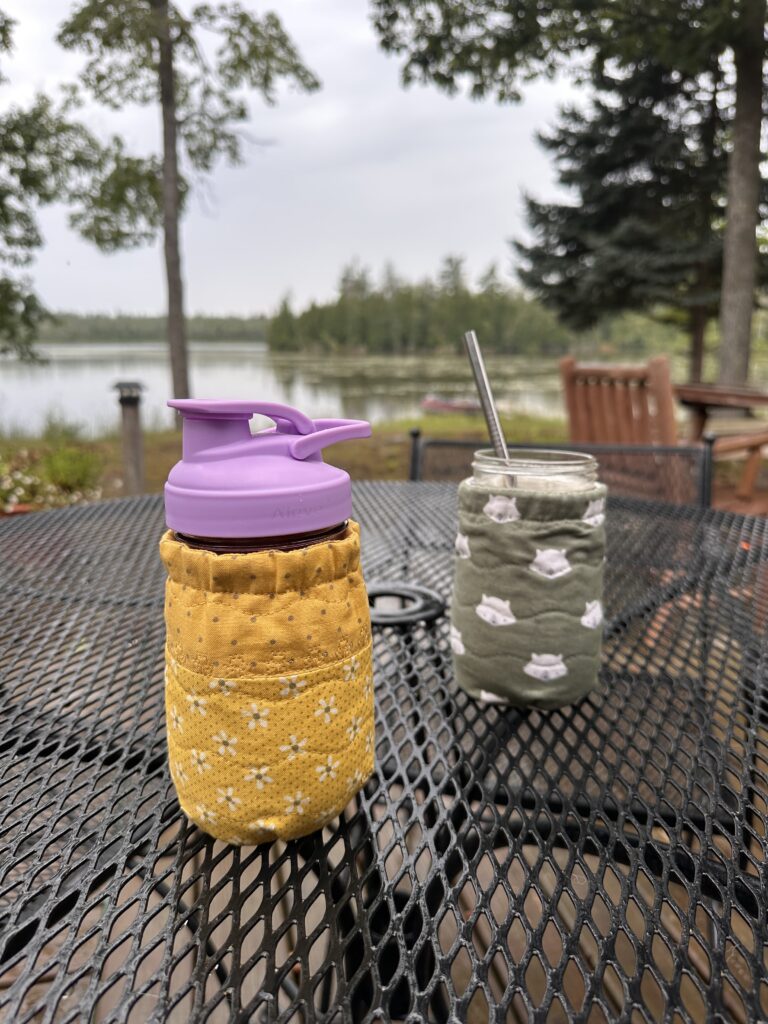
About the Cozies
The cozies serve three purposes (besides being such a fun sewing project and customizable):
- one is to protect the glass
- the second is to insulate the glass contents – keeps cold drinks colder longer and hot drinks hotter longer
- and the third is it absorbs condensation
So it keeps whatever is in the glass cold or hot, protects your hand, protects the glass from breakage, and protects your table from moisture from the glass sweating.
How to Sew a Glass Flute Mason Jar Cozy
I used cotton fabric for the exterior and lining fabric. I also used one layer of cotton batting and one layer of insulated or thermal batting.
Video Tutorial
If you’re a visual learner, you might find my video tutorial helpful. You can watch it below or on YouTube.
Thanks for watching the video! If you found it helpful, please be sure to like the video and subscribe to my YouTube channel. When you interact with the videos, you tell YouTube that this content is relevant and it helps other sewists find the video tutorials. So, thank you!
Supplies Needed:
- cotton fabric for cozy exterior
- cotton fabric for cozy lining
- matching thread (cotton or polyester)
- thermal batting
- elastic
Tools Needed:
- scissors
- acrylic ruler
- rotary cutter
- pins or clips
- safety pin
- seam ripper
And of course you will need your sewing machine, presser foot (I like to use the Acufeed foot. A walking foot could also be used.), and a 90/14 sewing machine needle.
Fabric Requirements
- fat quarter of cotton fabric for exterior and lining
- cut: 5-1/2″Hx10-1/2″W (2)
- cut: 3-1/2″ round diameter (2)
- thermal batting
- cut: 5″Hx10″W (1)
- cut: 3-1/2″ round diameter (1)
- elastic
- cut: 8-1/2″ long


Ball Flute Glass Cozy
Make a fun and practical cozy that fits the Ball Flute Mason Jars. The cozy can be made from scraps of fabric or coordinating fabrics. The batting helps to keep the contents cold/hot and absorbs moisture from condensation. Have fun with the cozies and use your favorite fabrics!
Materials
- cotton fabric
- thermal or insulated batting
- matching thread
- 1/4" wide elastic
- 90/14 sewing machine needle
Tools
- scissors
- rotary cutter
- acrylic ruler
- self-healing cutting mat
- pins
- clips
- safety pin
- iron
- sewing machine
Instructions
STEP 1: PREPARE PATTERN
Once you download the pattern, be sure to print it at 100% (full or actual size). Then simply cut out the pattern pieces along the outside of the solid line.
STEP 2: CUT FABRICS
FABRIC A - Flute Cozy Exterior Fabric
- Layout Pattern Piece A on top of your exterior fabric. Pin in place. If you are using directional fabric, be sure to lay the pattern piece out so the direction is going up and down.
- Layout Pattern Piece B on top of your exterior fabric. Pin in place.
- Cut out the fabric by cutting close to the outside of the solid black lines of the pattern pieces.
- Or you can simply cut a rectangle that measure 5-1/2"Hx10-1/2"W for Piece A and a circlie that is 3-1/2" diameter for Piece B.
- If you are using the same fabric for the exterior and lining, you will need to cut out two pieces for Pattern Piece A and Pattern Piece B.
FABRIC B - Flute Cozy Lining Fabric
- Layout Pattern Piece A on top of your lining fabric. Pin in place.
- Layout Pattern Piece B on top of your lining fabric. Pin in place.
- Cut out the fabric by cutting close to the outside of the solid black lines of the pattern pieces.
FABRIC C - Thermal Batting
- Layout Pattern Piece C on top of your thermal batting. Pin in place.
- Layout Pattern Piece D on top of your thermal batting. Pin in place.
- Cut out the batting by cutting close to the outside of the solid black lines of the pattern pieces.
- Or you can simply cut a rectangle that measure 5-"Hx10"W for Piece C and a circle that is 3" diameter for Piece D.
STEP 3: QUILT
- Lay the exterior fabric (Piece A) wrong side up and center the thermal batting (Piece C) on top. It does not matter which side of the thermal batting faces the fabric. Place a couple of pins or clips to secure the pieces together.
- Flip the pieces over so the right side of the fabric is facing up and the thermal batting is on the bottom.
- Next you will quilt the two pieces together. You can stitch it horizontally, vertically, diagonally or any way you want. I quilted mine one inch apart horizontally, I also use a quilting guide bar which helps me to stitch evenly spaced lines. Be sure you have your sewing machine loaded with the thread that you want to use for your quilting as this thread will show. The thread in your bobbin will not show.
- Repeat with exterior fabric bottom (Piece B) and the batting (Piece D). For the bottom I stitched straight down the middle of the circle, then rotated my fabric and stitched straight down the middle. I then added another row of stitching between each of those rows.
STEP 4: STITCH
- First, you will stitch the lining to the exterior fabric. So lay the exterior fabric right side up. Place the lining fabric right side down (right sides facing each other) on top of the exterior piece. Line up the long top edge and pin or clip in place. Be sure if you’re using directional fabric that you have the exterior fabric going in the correct direction. This seam will be the top of the cozy.
- Using a 1.8-2.0mm stitch length and a 1/4" seam allowance, stitch the lining and exterior fabric pieces together along the long edge. Be sure to backstitch at the beginning and end to secure your stitches. Press the seam open.
- Now you’ll stitch the side of the cozy together. To do so, open up the two fabric pieces that you just stitched together and line up the the short edges. You should have the lining fabric lined up with the other end of the lining fabric and the exterior with the other end of the exterior fabric. Pin or clip together making sure you have matched up the center seam.
- Stitch using a 1/4" seam allowance. Backstitching at the beginning and end to secure your stitches. Press your seam open.
- Fold the lining piece down along the top stitch line, lining up the raw edges and side seam. Make sure the side seam is laying flat inside the two layers of fabric. You should have the lining facing right side out and the exterior fabric should be on the inside facing right side out. In other words, the exterior and lining fabrics have the wrong sides or back sides against one another. Pin or clip along the raw edge.
- Using a long basting stitch, stitch close to the edge along the raw edge about 1/8" away from the edge.
- Lay the exterior bottom piece right side down and lay the lining piece right side up on top (the two wrong sides should be touching). Pin or clip together.
- Baste around the outer edge using a 1/8" seam allowance.
- Insert the cozy bottom piece into the main cozy piece right sides together. You should see the lining piece on the outside of both the bottom and main/side cozy pieces. Pin or clip the raw edges together. The side piece will be bigger than the bottom piece. Just pin the two together trying to evenly space the slack.
- Stitch the two pieces together using a 1/4" seam allowance.
- Then go over the edge using a zig zag stitch to finish the raw edges.
- With the lining still on the outside, you will stitch along the top edge 5/8" from the edge. Backstitch to secure your stitches. This will create the casing for your elastic.
- Use your seam ripper to open up the seam on the lining side near the top, between the seam you just stitched and the top edge of the cozy.
- Attach a safety pin to one end of the 8-1/2" piece of elastic. Feed the safety pin through the slit in the seam that you just opened, going all the way around the top edge and coming back out the opening. Make sure that you don’t accidentally pull the other end through.
- This part can be a little tricky. But you need to overlap the two short ends, pin them in place and then zig zag stitch to join and secure the two ends. You may need to pull out more elastic so that you have sufficient space for sewing. Go back and forth over them a couple of times with the zig zag stitch. Trim threads.
- Then pull on the top edge to stretch the elastic so that the ends go inside the casing. To finish off that seam, you can either whipstitch it closed by hand or use a zig zag stitch across the opening.
- Turn the Flute Jar Cozy right side out. Your cozy is ready to be used!
Notes
You can use the same fabric for the exterior and lining or two contrasting fabrics.
If you are using the same fabric for the exterior and lining, you will need to cut out two pieces for Pattern Piece A and Pattern Piece B.
The batting is cut smaller than the fabric in order to reduce bulk in the seam allowance. The quilting will secure the batting to the fabric.
HOW TO USE THE COZY
To use the cozy, I find it easier to turn the fluted glass upside down and then slide the cozy down over the glass. Turn the glass right side up and fill with your favorite beverage!
HOW TO CARE FOR THE COZY
Assuming you used cotton or other machine washable fabrics, the cozy is machine washable. I do recommend letting the cozies line dry.
Recommended Products
As an Amazon Associate and member of other affiliate programs, I earn from qualifying purchases.
-
 Amazon Basics Full-Size Ironing Board
 -
 Oliso M3Pro Project Steam Iron with Solemate
 -
 Oliso TG1600 Pro Plus 1800 Watt SmartIron with Auto Lift
 -
 Rowenta Steam Force Pro Stainless Steel Soleplate Steam Iron
 -
 Fiskars Self Healing Cutting Mat, 24x36”
 -
 OLFA 45mm Ergonomic Rotary Cutter
 -
 Missouri Star Rotary Cutter, 45mm Blade
 -
 Fiskars Acrylic Ruler, 6x24 Inch
 -
 Dritz Extra-Fine Glass Head Pins, 1-3/8-Inch (250-Count)
 -
 Clover Wonder Clips
 -
 Missouri Star Seam Ripper
 -
 Missouri Star Scissors All Purpose - 8” Stainless Steel Scissors
 -
 Missouri Star Scissors All Purpose - 6” Precision Tip Scissors
 -
 AIEVE Mason Jar Lids with Flip Top
 -
 Ball Glass Flute Jars, 16 Ounces, 4 Pack
Get the Pattern
To download the Ball Flute Glass Cozy Pattern, just complete the below form. You’ll not only be subscribed to the Hooked on Sewing newsletter, where you’ll have sewing ideas like this one delivered straight to your email inbox, but a link to the patter will also be emailed directly to you.
So fill out the form and then check your inbox!



I would love to have the cozy pattern. I enjoy your emails.
Loved doing this,made four I had a hard time sewing the bottoms on until on the 3rd one I sewed around the 3 layers after sewing the x’s made to so much easier to sew onto the tube!
Joy, that is a great tip! I’ve actually started either zigzag stitching or using my serger around the edges of the bottom layers before sewing it into the sides. It does help the cozy come together much easier.
Thanks for sharing!!